
Configuration procedure, step by step, by video in less than 4 minutes, of the modem D-LINK DSL-124 as a Router, how to configure and secure the WIFI, and how to change the modem administrator password...
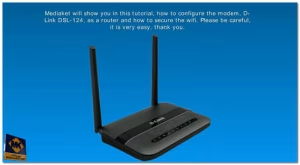
The D-LINK DSL-124 is a wireless N300 ADSL2+ modem router that provides all the functions that a user needs to establish a secure and high-speed link to the Internet.
It has an integrated ADSL2/2+ modem that supports download speeds up to 24 Mbps, a firewall to protect your network from online threats, Quality of Service (QoS) to prioritize traffic for important applications, an 802.11n wireless LAN for connecting your devices wirelessly, and four Ethernet switch ports for connecting your wired devices.
Here are the specifications of the D-LINK DSL-124 modem router:
Integrated ADSL2/2+ modem.
802.11n wireless LAN.
4 Ethernet switch ports.
WPA/WPA2 and WEP encryption.
Stateful Packet Inspection (SPI) firewall.
Network Address Translation (NAT).
Quality of Service (QoS).
The D-LINK DSL-124 is a good choice for home and small office users who need a reliable and affordable wireless router. It is easy to set up and use, and it provides a secure and high-speed connection to the Internet.
This video is about how to configure the D-LINK DSL-124 modem as a router and how to secure the Wi-Fi.
The first step is to log in to the modem's web interface. To do this, you will need to know the IP address of the modem, the username, and the password. The default IP address is 192.168.1.1, the default username is admin, and the default password is admin.
Once you are logged in, you will need to click on the "Setup Wizard" button. The Setup Wizard will walk you through the process of configuring the modem as a router.
The first step in the Setup Wizard is to select your time zone. Once you have selected your time zone, you will need to select your DSL Wan connection type. The most common DSL Wan connection types are PPPoE and DHCP.
If you are using a PPPoE connection, you will need to enter your username and password. Your username and password will be provided by your internet service provider (ISP).
If you are using a DHCP connection, you will not need to enter any additional information. The modem will automatically obtain your IP address from your ISP.
Once you have entered your connection information, you will need to select a name for your Wi-Fi network. You will also need to select a security level for your Wi-Fi network. The most common security levels are WPA2 and WPA3.
Once you have selected a security level, you will need to enter a password for your Wi-Fi network. Your password should be at least 8 characters long and should contain a mix of upper and lowercase letters, numbers, and symbols.
Once you have entered your password, you will need to click on the "Apply" button. The modem will then apply your changes and restart.
Once the modem has restarted, you should be able to connect to your Wi-Fi network using your computer or mobile device.
Here are some additional tips:
Make sure that your modem's firmware is up to date. This will help to ensure that your modem is secure and that you are able to take advantage of the latest features.
Use a strong password for your Wi-Fi network. This will help to prevent unauthorized access to your network.
Be careful about what information you share over your Wi-Fi network. If you are using a public Wi-Fi network, it is especially important to be careful about what information you share.