
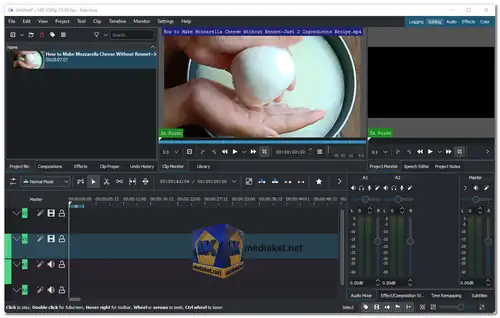
Kdenlive is a free and popular open-source, non-linear video editing software based on the MLT Framework, KDE and Qt. It designed for creating and editing videos on Linux, macOS, and Windows platforms. It is a non-linear video editor, which means that you can work with video and audio tracks in a flexible and non-destructive manner. You can arrange clips on multiple tracks and make changes to your project without permanently altering the original source files...
This feature is particularly useful for creating complex video projects that require precise editing and manipulation.
Here are some of the key features of Kdenlive:
Multi-track video editing:
Kdenlive allows you to edit multiple video and audio tracks simultaneously. This makes it easy to create complex projects with multiple layers of video and audio.
Audio editing:
Kdenlive includes a powerful audio editor that allows you to edit and mix audio tracks. You can use the audio editor to add effects, adjust levels, and create fades.
Effects and transitions:
Kdenlive includes a wide range of effects and transitions that you can use to enhance your videos. You can use effects to change the color, brightness, contrast, and other properties of your videos. You can also use transitions to create smooth transitions between clips.
Titler:
The titler in Kdenlive allows you to create and add text to your videos. You can use the titler to add titles, credits, and other text to your videos.
DVD authoring:
Kdenlive can be used to create DVDs with your videos. You can use the DVD authoring features in Kdenlive to create menus, add chapters, and burn your videos to a DVD.
Proxy editing:
Kdenlive can use proxy files to make editing large videos easier. Proxy files are smaller versions of your video files that are used for editing. This can make editing large videos much faster.
Keyframe animation:
Kdenlive supports keyframe animation, which allows you to animate the properties of your videos over time. This can be used to create smooth animations, such as zooming in on a clip or changing the color of a text overlay.
Configurable interface:
The interface in Kdenlive can be customized to suit your needs. You can change the layout of the interface, the shortcuts, and the toolbars.
Support for a wide range of video formats:
Kdenlive supports a wide range of video formats, including AVI, MP4, MKV, and WMV. This means that you can import and export videos in a variety of formats.
Kdenlive is a powerful video editing tool that can be used for both basic and professional editing. It is available for Linux, FreeBSD, and Windows. If you are looking for a free and open-source video editing software, then Kdenlive is a great option.
Let's explore the pros of using Kdenlive:
Open-source and Free:
Kdenlive is completely free to use, and its open-source nature means that anyone can access, modify, and distribute the software without any cost.
Cross-Platform Compatibility:
Kdenlive works on multiple operating systems, including Linux, macOS, and Windows, making it accessible to a wide range of users.
Non-Linear Editing:
Kdenlive's non-linear video editing approach allows users to work with multiple video and audio tracks, providing flexibility and ease in creating complex video projects.
Wide Format Support:
The software supports a broad range of video, audio, and image formats, reducing the need for additional format conversions and ensuring compatibility with various media sources.
User-Friendly Interface:
Kdenlive offers a relatively intuitive and user-friendly interface, making it accessible to both beginners and experienced video editors.
Rich Set of Features:
It comes with a decent selection of video and audio effects, transitions, title templates, and more, giving users the tools to enhance the visual quality of their videos.
Proxy Editing:
Kdenlive supports proxy editing, allowing users to work with lower-resolution files for smoother editing, especially useful for those with less powerful hardware.
Community Support:
The software has an active community of developers and users who provide support, tutorials, and documentation, fostering a helpful environment for troubleshooting and learning.
Kdenlive - Changelog:
Performance optimizations when moving clips in the timeline and across multiple project bins.
Packaging improvements to macOS and Windows versions.
Fixes to copy/paste of effects, rotoscoping, Nvidia...
Install version:
Size: 111.36 MB - Download
Portable version:
Size: 110.72 MB - Download
Kdenlive is a free and open-source video editing software that offers a range of features for creating and editing videos.
Here's a step-by-step guide on how to use Kdenlive:
First, ensure you have Kdenlive installed on your computer. You can download it from the link above (Direct link from the official website), and follow the installation instructions for your operating system (Portable version is available).
1. Opening Kdenlive and Creating a New Project:
- Launch Kdenlive.
- Go to "File > New".
- Choose a project folder and select an appropriate project profile (e.g., 720p, 23.97 fps).
2. Changing the Theme (Optional):
- Go to "Settings > Colour Theme > Breeze-Dark" if you prefer the dark theme.
3. Adding Media Clips:
- Use the "Project" to add video, audio, or image clips.
- Click on "Project" from menu or right click on Project Bin windows and Click the "Add Clip or Folder" icon and select the clips you want to add.
4. Arranging Clips on the Timeline:
- Drag and drop clips from the Project Bin onto the timeline.
- Arrange the clips in the desired order and position.
5. Editing and Trimming Clips:
- Use the "Razor tool (shortcut: R) to cut clips at specific points.
- Use the "Selection" tool (shortcut: V) to move and arrange clips on the timeline.
6. Adding Transitions:
- Overlap two clips on the timeline to create a transition.
- Right-click on the overlap and choose a transition type (e.g., wipe).
7. Adding Effects:
- Click on a clip to select it.
- Go to "View" and chaeck "Effects" to display Effects ta-
- Click on "Effects" tab to display effects list. Choose an effect and drag it onto the clip.
8. Adding Titles and Text:
- Click on the "Prject" menu and select "Add Title Clip".
- Customize the text, font, color, and position of the title.
9. Audio Editing:
- Drag and drop audio files onto audio tracks in the timeline.
- Adjust volume, fade in/out, and position of audio clips.
10. Previewing the Project:
- Press "Space" or click the "Play" button to preview the project.
11. Saving and Exporting the Project:
- Go to "File > Save" to save your project.
- Go to "Project > Render" to export the project as a video file.
12. Rendering the Project:
- Choose output settings (e.g., file format, location).
- Click "Render to File" to start rendering.
Kdenlive offers a lot of additional features and functionalities, so feel free to explore and experiment to create the desired video output. Remember, practice and experimentation will help you become more proficient with Kdenlive.